Thursday, June 30, 2016

Project Open Core: Final Build Pics

This build is DONE!!  That doesn't mean I won't make any changes, as I am a constantly tinkering with things, but the core system is ready to go.  I still need to moidfy a few things at my desk and route cables before I move it over, but still calling the project done at this point.

Not really any reason to describe each picture, so just going to post a bunch of them from different angles.


Project Open Core: Mayhem Blue Pastel Concentrate

Sneak peak at the completed build.  Will have the "Final" pictures up within the next day or so. Until then, put together a little video showing the process of adding the Mayhem Blue Pastel concentrate to the hardline tubing loop.


Monday, June 27, 2016

Project Open Core: Benchmarks & Temps

I am putting together a neat little video of the filling process and adding the Mayhem Blue Pastel dye to the system. While working on that, I had a chance to play with a bit more Overclocking, and wanted to share those specs along with some Benchmarks and Temperatures.

Overclocking was pretty easy on this system.  I was able to hit 4.8GHz on the 6700K fairly easily using a core voltage of 1.375, and temps never got above 58C during stress testing. I tried for 5.0GHz, but no matter how much voltage I threw at it, couldn’t get stable enough to run benchmarks, so stayed with 4.8GHz, which really isn’t that bad with the temps I am seeing.

With the GPU the highest I was able to get and be 100% stable on the EVGA GTX 1080 SC, was a core clock of 2151MHz and Memory at 5500MHz.  That’s not overly impressive compared to other GPUs in the past, but apparently the Pascal series cards already come out towards the peak of their frequency threshold. Even then, a 24% core clock increase over reference 1080 cards isn’t too shabby, especially being that my GPU temps have yet to rise above 40C.


Once I had the CPU and GPU OC’d, it was time to throw some benchmarks and games at it.

Unigine Valley Benchmark 1.0
Setting: Exreme HD
FPS: 120.4
Score: 5038


Unigine Haven Benchmark 4.0
Setting: Extreme
FPS: 101.8
Score: 2563


Ashes of the Singularity
Setting: Crazy, DX11
Average FPS: 65.5


Shadow of Mordor
Setting: Ultra
Average FPS: 174.45


3DMark FireStrike 1.1
Score: 19499
Compare: Better than 982% of all results


3DMark FireStrike Extreme 1.1
Score: 10735
Compare: Better than 92% of all results


3DMark FireStrike Ultra 1.1
Score: 5807
Compare: Better than 78% of all results


3DMark Sky Diver 1.0
Score: 42539
Compare: Better than 99% of all results


Sunday, June 26, 2016

Project Open Core: Initial Fill and Leak Testing

Now that the tubing and cables are done, time to fill this thing up with fluid.  Before I did an entire system fill, there were 2 things I needed to do.

Needed to flush the radiator of any particulates.  I have heard in a lot of reviews that radiators can have all kinds of metal shards inside time left over from the manufacturing process.  I detached the radiator from the rest of the loop, and flushed it with distilled water.  Pleased to find very little in they way of particulates, so drained it and reattached the tubing.
Then had to decide on what color of LED I wanted to use in the Res, being that is was one of the few lights in the system that wasn’t RGB.  I filled it up a little over halfway, added a bit of Blue Dye, and first tried the White LED, which is the photo on the left.  It looked good, but wanted to try blue as well.

At first I was worried that the blue would look purple and not match the rest of my system (kinda like it does in the picture on the right).  But in real life, it is the perfect color blue, and seems to light up the entire Res a bit better than the white one, so going to stick with the blue LED for now. Its an easy change if I decide to go with the white sometime in the future.


After deciding on the LED color, I drained the Res, connected the tubing to the rest of the system, and began filling with distilled water for the first official “Leak Test”.  Quick note of filling a system with this XSPC Photon Res… you will need a book, which you can see in the bottom right of my photo below.  The case/res has to be tilted at an angle during the fill process, or the opening will keep backing up with air bubbles.  The first 5 minutes of the fill process were very frustrating until I figured this out.  After sliding a good size book under the right leg of the case, filing became very easy.

Was able to fill the whole system in a just a few minutes, alternating between running the pump and tilting the case to release air bubbles. It looks like it is going to take around 1.4 liters to completely fill the system loop and res.  I then ran it for a few hours, and didn't find a single drop of water outside of the loop.  Leak test completed successfully.


Thursday, June 23, 2016

Project Open Core: Sleeving

My last build incorporated sleeving from MDPC (MurderMods), and it turned out really good.  I still have a lot of sleeving left over from that project, but decided to try something different for this build. I have heard a lot of things, both good and bad, about Paracord sleeving, so I decided to do a sample to see if it would work for this build.  As I mentioned before, I like MDPC sleeving, but I find it a bit stiff to work with at times.  So I purchased a few hundred feet of coreless paracord, which cost less than $25, and got started sleeving.

In addition to the custom sleeving, I typically make my own power cables for each build.  I find by doing this I am able to limit all the extra cable length taking up room in the case, and it allows for better looking cable routing.  Here is a pic of the primary tools used for the job.


  • Paracord (Black)
  • Paracord (Royal Blue)
  • Paracord (Slate Grey)
  • Lutro Paracord Sleeving tool (makes job snag free)
  • 100ft 18AWG Wire
  • PSU Power Connector Pins (lots)
  • MDPC Crimping Tool
  • MDPC Pin Extractor
  • Molex PSU Connector Heads (Various)
  • Precision Titanium Snips
  • Hobby Knife
  • Bic Lighter


After doing a few trail runs and deciding that I really like using Paracord, I set to work making my cables. In addition to looking great, and being very flexible, I like that with Paracord I can sleeve the cables without having to use heatshrink.  I personally think it looks cleaner, and it cuts down the time required to get the job done.


For most of the build I am using “Wire Wraps” that are 3D printed by Ensourced. I find they are really easy to work with, and look great once installed.  They do a good job of keeping the sleeved cables tidy, especially when doing bends.

Here you can see a comparison of my new paracord sleeved ATX connector vs my older one using MDPC sleeving.  So pretty!


Here we have another comparison of the two types of sleeving.  Really impressed with the look and feel of the paracord.  Also liking the combination of the 3 colors, and how well it goes with the rest of the build.


The cable shown below is one I had to create later on in the process after I was having boot issues caused by me not adding a power connector to my USB 3.1 expansion card.  You can see the cable plugged in the bottom part of this picture as well.  Glad I got that one figured out!


Here we have the final stage of the custom cables and sleeving in all it’s glory.  Really liking how the colors look, and how clean the paracord sleeving turned out.  Cable management in the back is good, but could be better.  May work at securing everything down a bit more once I verify that everything is working the way it should.


Tuesday, June 21, 2016

Project Open Core: Hardline Tubing

For this build, I decided to go with Monsoon Hardline PETG Tubing 1/2" ID, 5/8" OD.  I initially had purchased PrimoChill PETG Tubing, but decided that the diameter was too thin and liked the look of ⅝” OD better.  This is my first time “tube bending” so I purchased a lot of it since I knew that I had to account for the varoius screw ups that would occur.  Luckily it is not very expensive.


Since it was my first time working with hardline tubing, I had to acquire a few tools to make sure my bends look good. I already had a few things, like the rotary pipe cutters and a heat gun, but also picked up some Monsoon Mandrels to help form bends, a measuring kit, and a tube bending rig made by Barrow which came in really handy.


I have noticed that a lot of people cutting tubing use a hacksaw, but I personally thing the rotary pipe cutter is a much better tool.  Not only does is make very straight cuts, but it leaves no mess, and gives the tubing a nice beveled edge as can seen in the picture above, and ensures I don’t damage the o-rings when sliding them on for the fittings.

The Barrows bending rig was very useful when doing more complex / multi angle bends, and assured not only my angles were dead on, but that the tubing was straight throughout the level plane I was working with.  It also allowed me to keep things stable when doing larger 180 bends than what the Monsoon mandrel kit supported.  Used a can of compressed air as a form for one of the bends, and it come out really nice.


For the most part, my bends held true to my original 3D render which I was glad to see.  One place where I had to simplify a bit is where the Motherboard outlet connected to the GPU block. I was initially going to go with a nice multi-bend solution, but realized after installing the fittings that my plan wouldn’t work.  There wasn’t enough clearance between the fitting and the motherboard housing to do a 90 degree bend from that location. So I used my measuring kit to form a more simple
“L” bend directly to the GPU block.


Not as fancy, but the end result still looks great.  Towards the end of the process, I was getting really good and quick at making quality bends.  I may change things around at some point, but for now, I am happy with the end result.  Time to move on to finishing up making some power cables and getting them sleeved.


Friday, June 17, 2016

Project Open Core: Hardware - Displays & Peripherals

I am working on wrapping up hardline bends and sleeving, and will post on those topics once completed. As my last “Hardware” post, going to run through my Displays & Peripherals.

I am a consultant, and about 50% of my job is on the road.  When not traveling I work from home. For my setup, I went with a custom Sit/Stand desk with motorized legs.  I usually start the day standing, but by 2-3pm, the knees start to ache a bit and I drop the desk and pull up a chair.  My displays are wall mounted, on articulating arms.  Although I can adjust them to my heart’s content, I have found a good location for them that I can use while standing or sitting, so they never move.


Using 3 monitors currently in a PLP configuration.

  • Primary Display - 30in Dell 3011U @ 2650x1600
  • Side Displays - 20in Dell 2007FP @ 1200x1600  (x2)

Total resolution is 3850x1600, which gives me a lot of good workspace.  Here is what the desktop looks like in a seamless “Print Screen”.  Using Display Fusion to manage my wallpapers, and a few Rainmeter “skins” to customize the look of the desktop and give me system stats at a glance.


Keyboard and mouse using a Corsair K70 RGB Mechanical Keyboard, and a Logitech G502 Mouse.  Both utilize RGB LEDs, and are customizable.

The newest addition to my setup is the Saitek X-56 Rhino H.O.T.A.S. Flight Controller.  I have been getting into Space Sims lately, and this has been a huge upgrade from my old but trusty Logitech Extreme 3D Pro joystick. The difference the new X56 has from the X55 is two additional thumb control sticks for your thumbs, specifically helpful for extra control with space sims, and the addition of RGB lighting.


Here is a pic of all of them together.  Really liking that manufacturers are going with RGB lighting so you don’t have to settle for whatever color they decide to ship units with.  Very easy to match the colors of the new build.  Customization FTW!


Wednesday, June 15, 2016

Project Open Core: Hardware - GPU

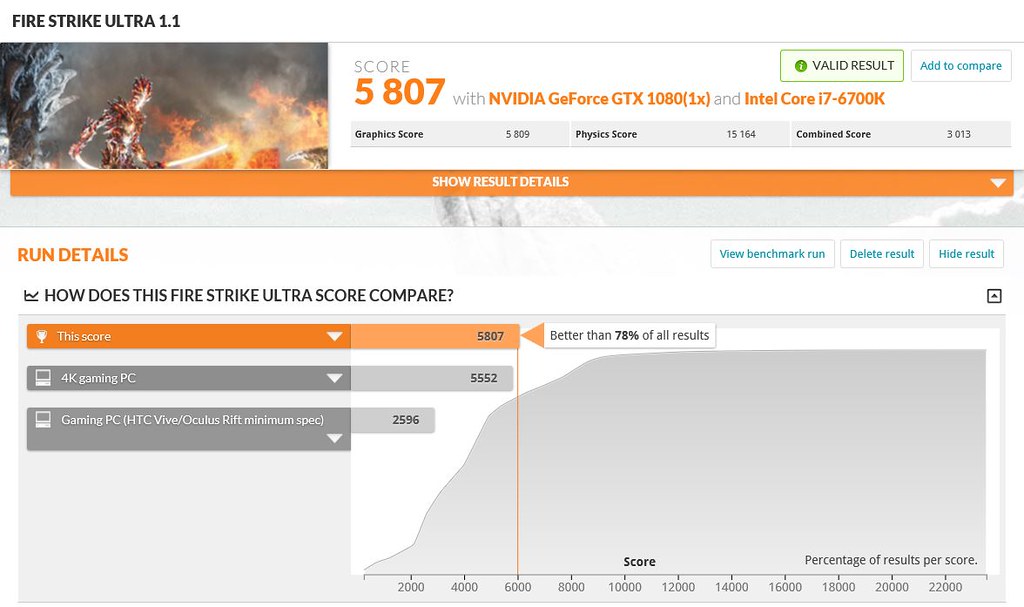
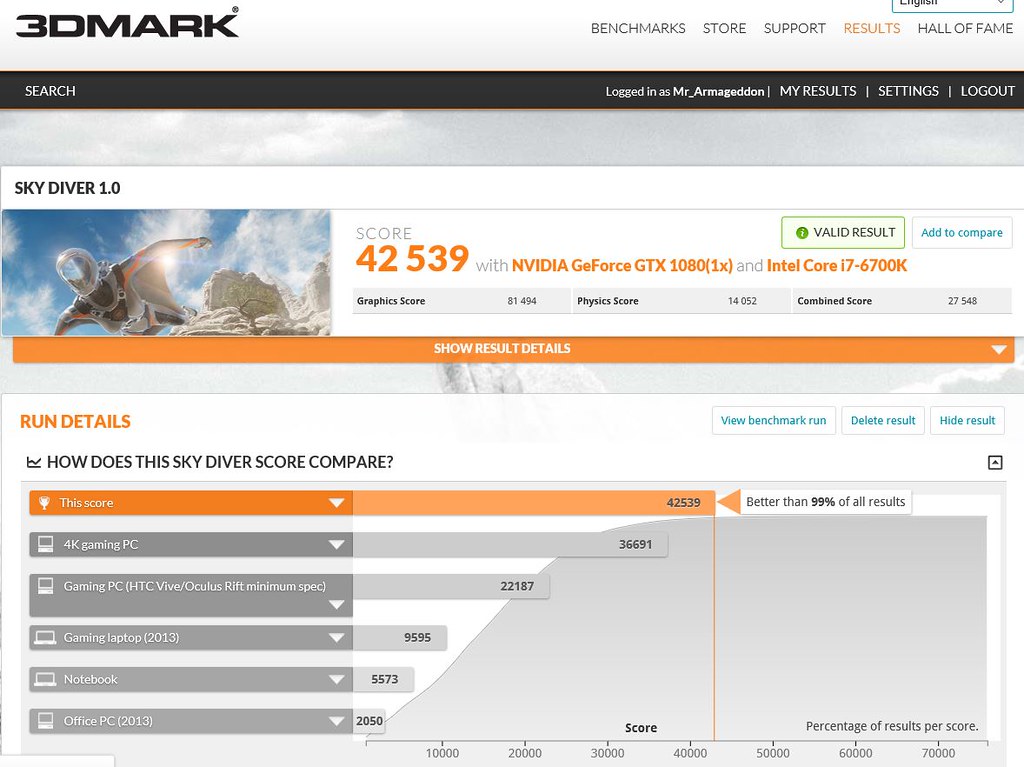
As stated in the OP, part of the reason I decided to build this sytem was to put together the hardware to provide a good VR experience with the Oculus Rift.  Being that the GPU is the most important factor in this, decided and upgrade from my GTX 970 was in order.

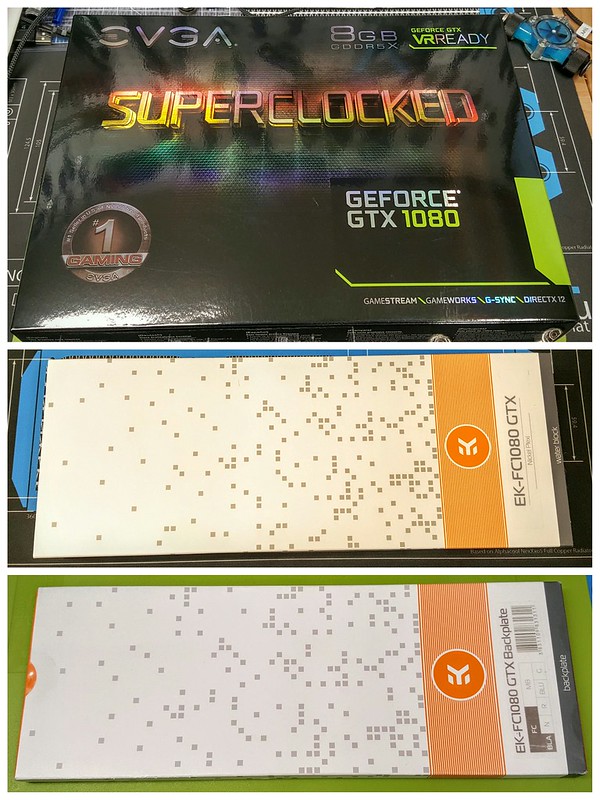
Timing worked out pretty well, as Nvidia recently released their “Pascal” cards, and I was lucky enough to snag an EVGA GTX 1080 SuperClocked Edition card from Newegg’s first available batch.  Didn’t even have to wait in a queue.  Since that particular card although overclocked out of the box still retains the reference PCB design, I picked up an EK Waterblock and Backplate to go with it.


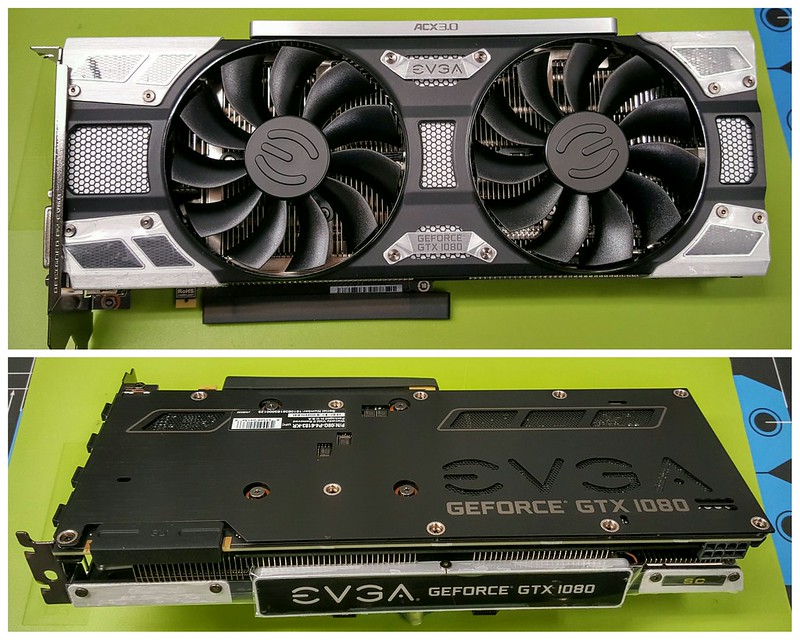
I have to hand it to EVGA, they made a really good looking card with the 1080.  Even though the stock cooler and backplate are coming off, wanted to take a sec to show what the card looks like before it gets “naked”.


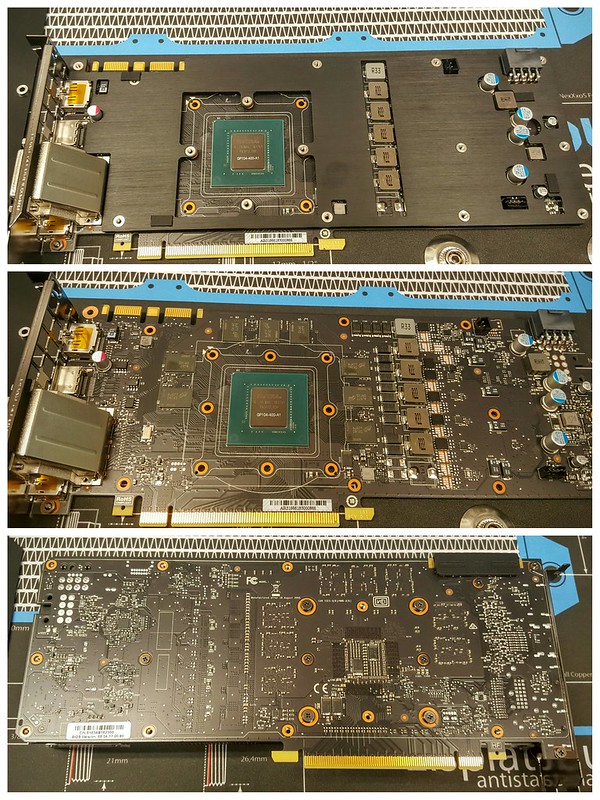
Removing the cover was very simple, and I was surprised to see a location where LED lights plug into the PCB.  On this particular version, the LED is white only, and the EK block covers the pins, so I didn't pay it much mind.   EVGA ships some sort of pre-shroud that goes between the cooler and the card.  It actually looks really cool, and it would have been great to be able to incorporate it into the water block, but they aren’t compatible, so it had to go.

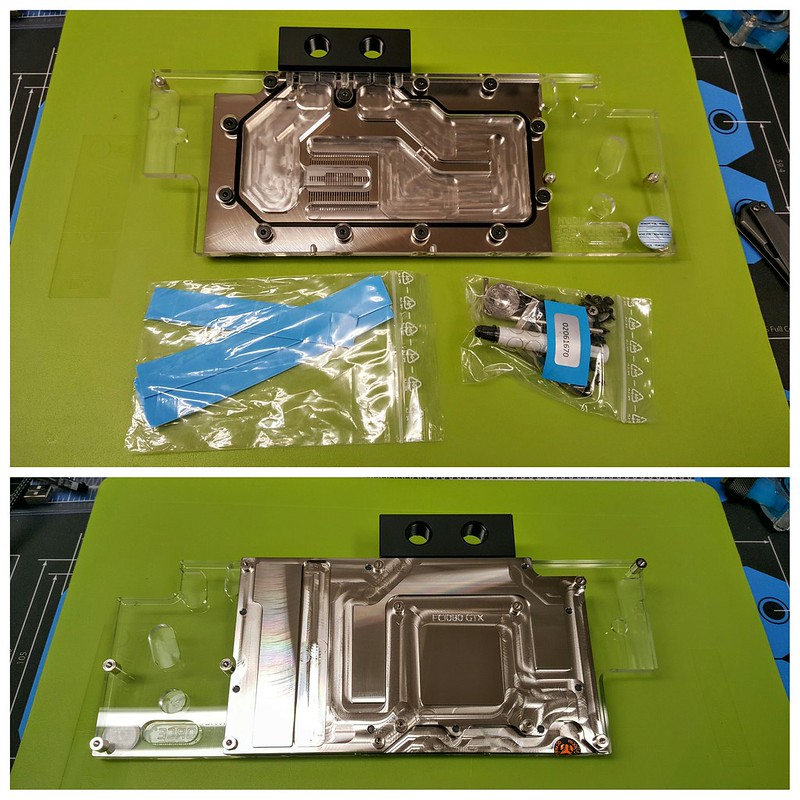
Behold a naked GTX 1080 SC. Important to note, that the stock EVGA backplate will NOT work with the EK Waterblock.  I had to purchase the EK backplate separately.


This particular EK block is the Nickel & Plexi combo. I like the look of the nickel, and wanted to be able to see the fluid as it goes through the block, so this really was my only option.  I wish they made one that was a nickel / acetal / plexi combo that looked all black, but still showed the fluid in the middle. Since they don’t make one, I did a few mods to achieve that look.


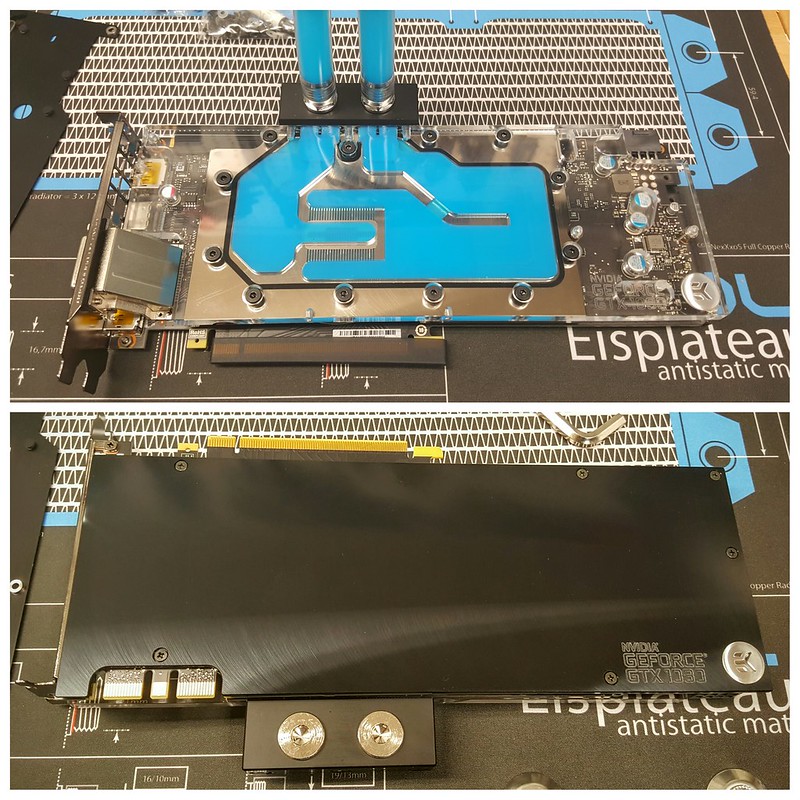
Here we have the card installed and a quick fluid test to see how it looks… and it looks great!   The backplate is very nice as well.


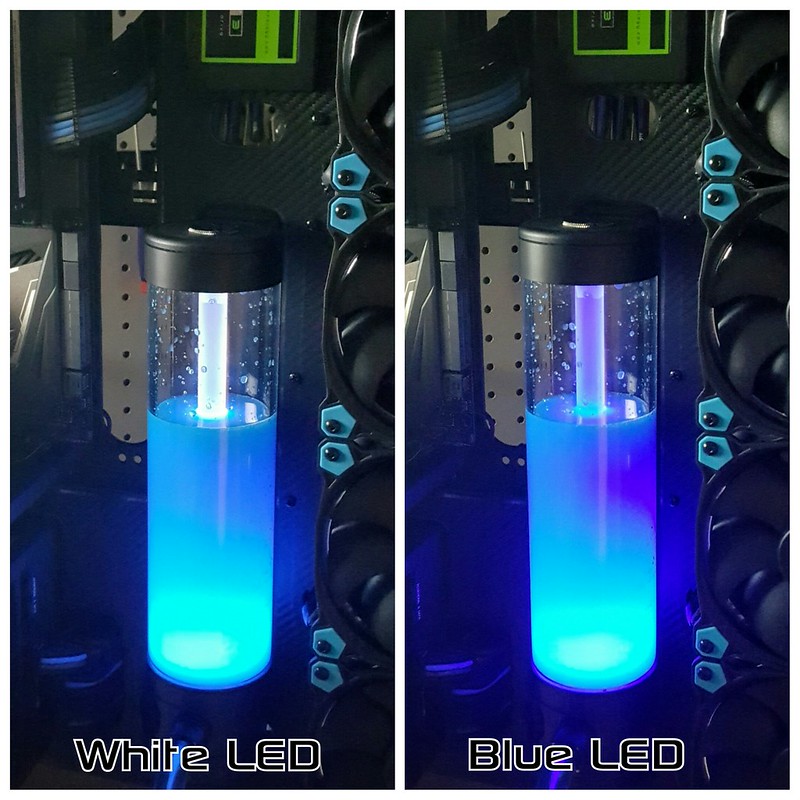
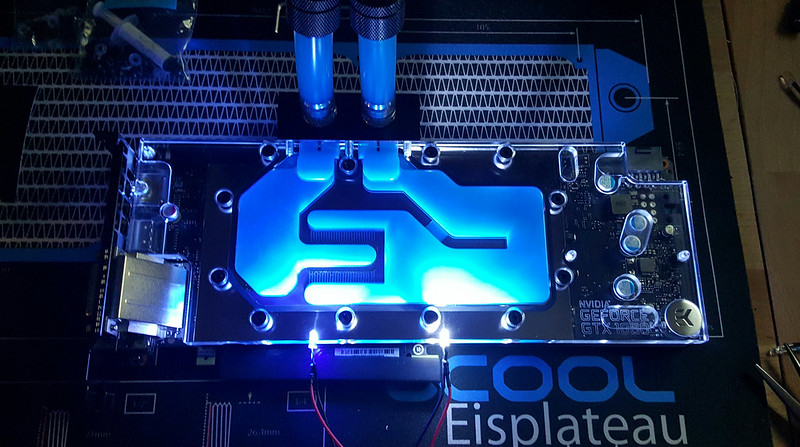
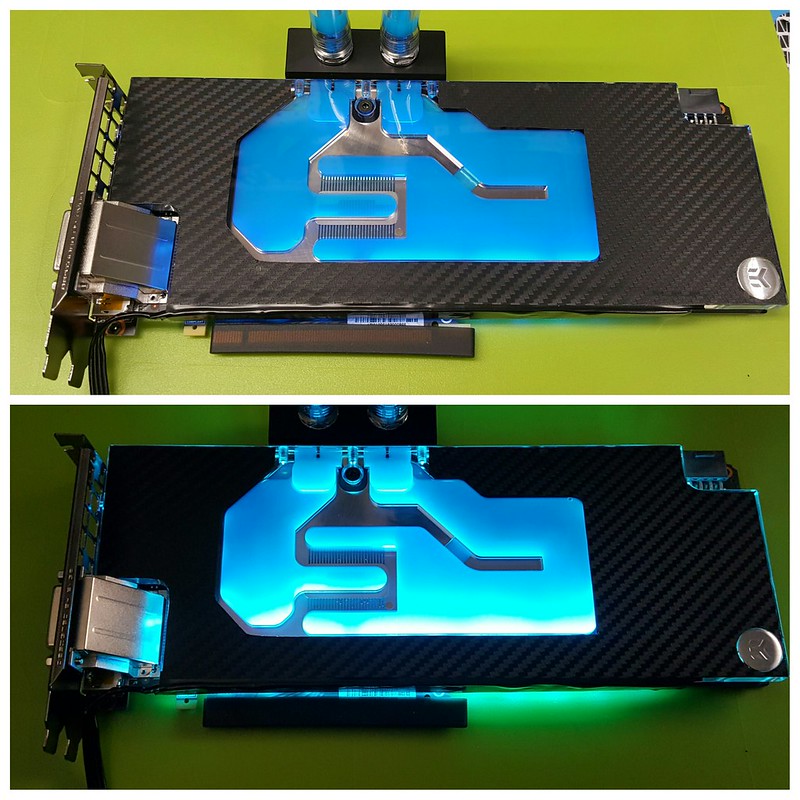
I wanted the fluid to glow blue in this card, and was initially planning on using the two pre-drilled 3mm holes for LEDs on the block. Gave them a shot, and found they are too bright of a focal point, and wash out the color of the fluid as seen below.


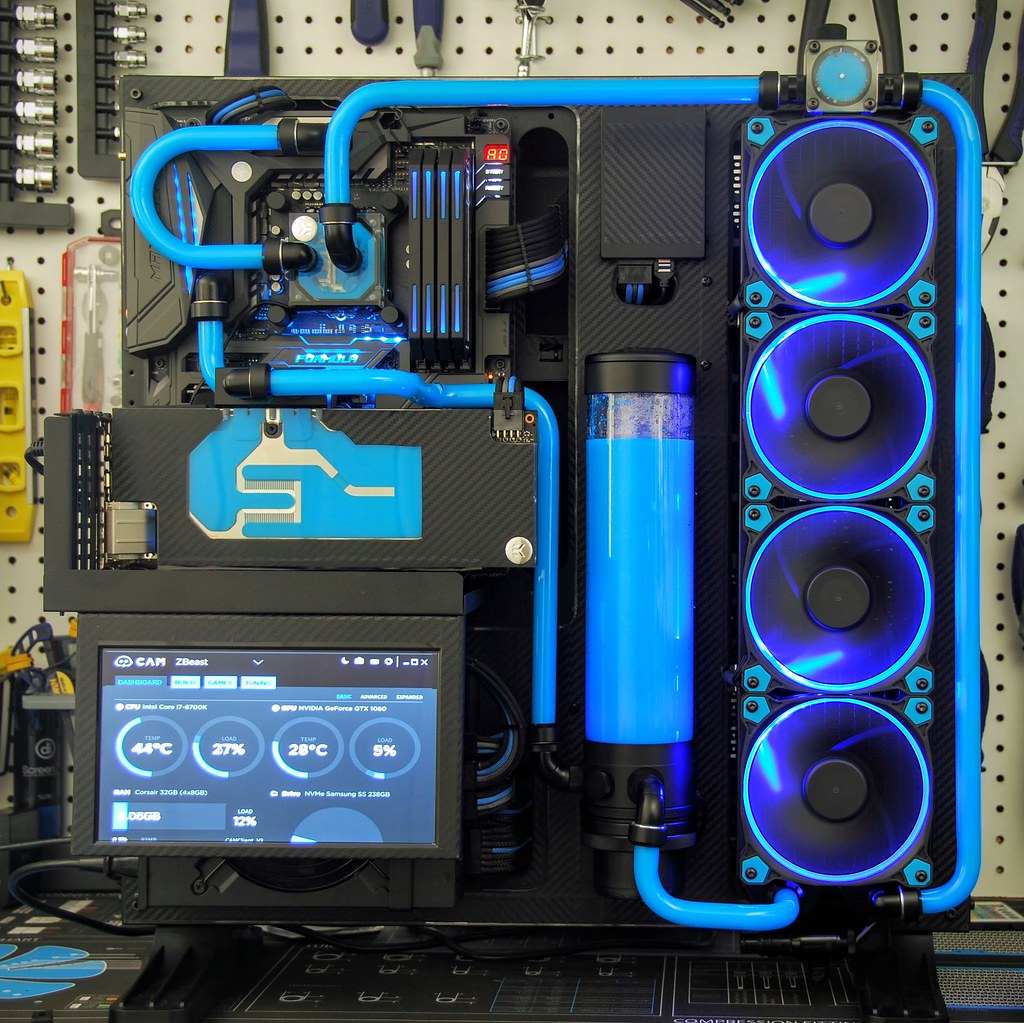
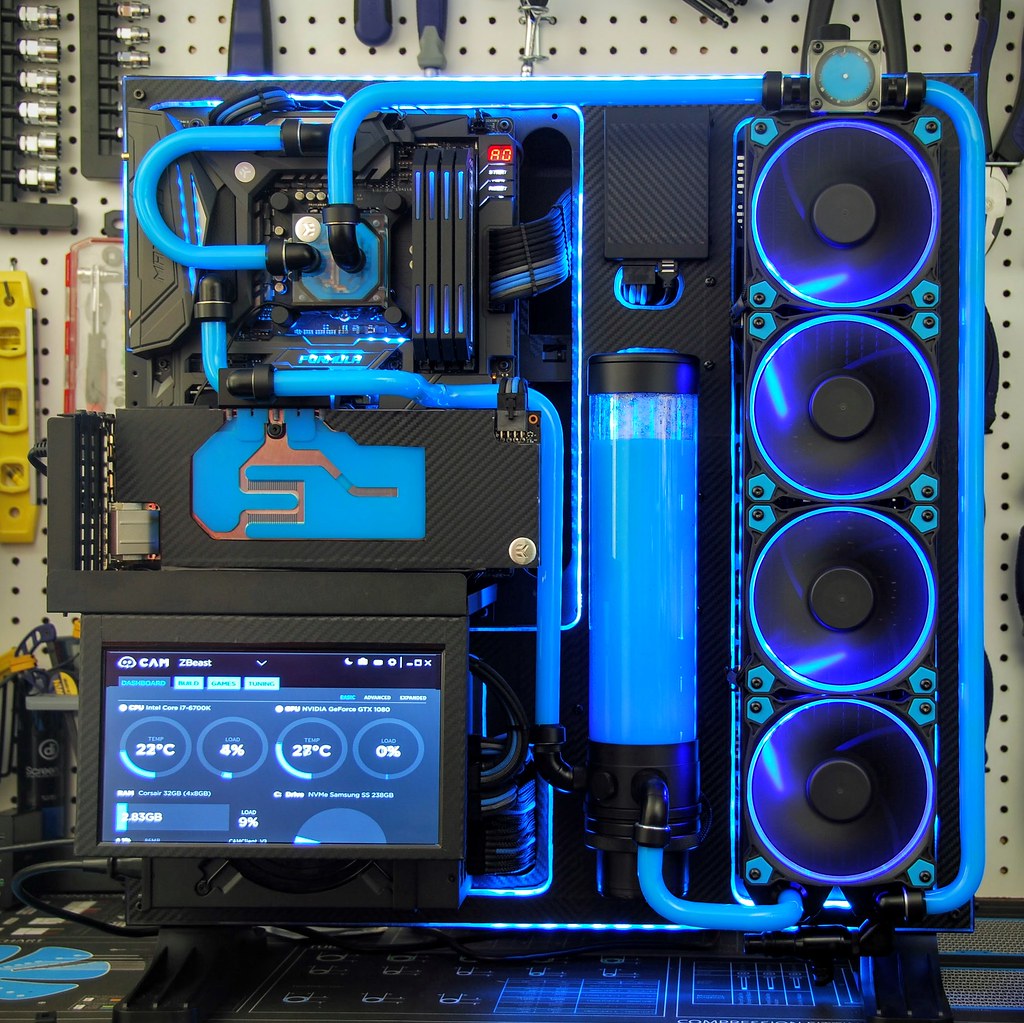
As a solution, I decided to add more RGB LED strips to both the GPU and CPU Waterblocks. Not oly does this allow me to get the color to match what I have going on around the case, but I can also tone down the brightness levels to a point where it just glows but doesn’t blind you.


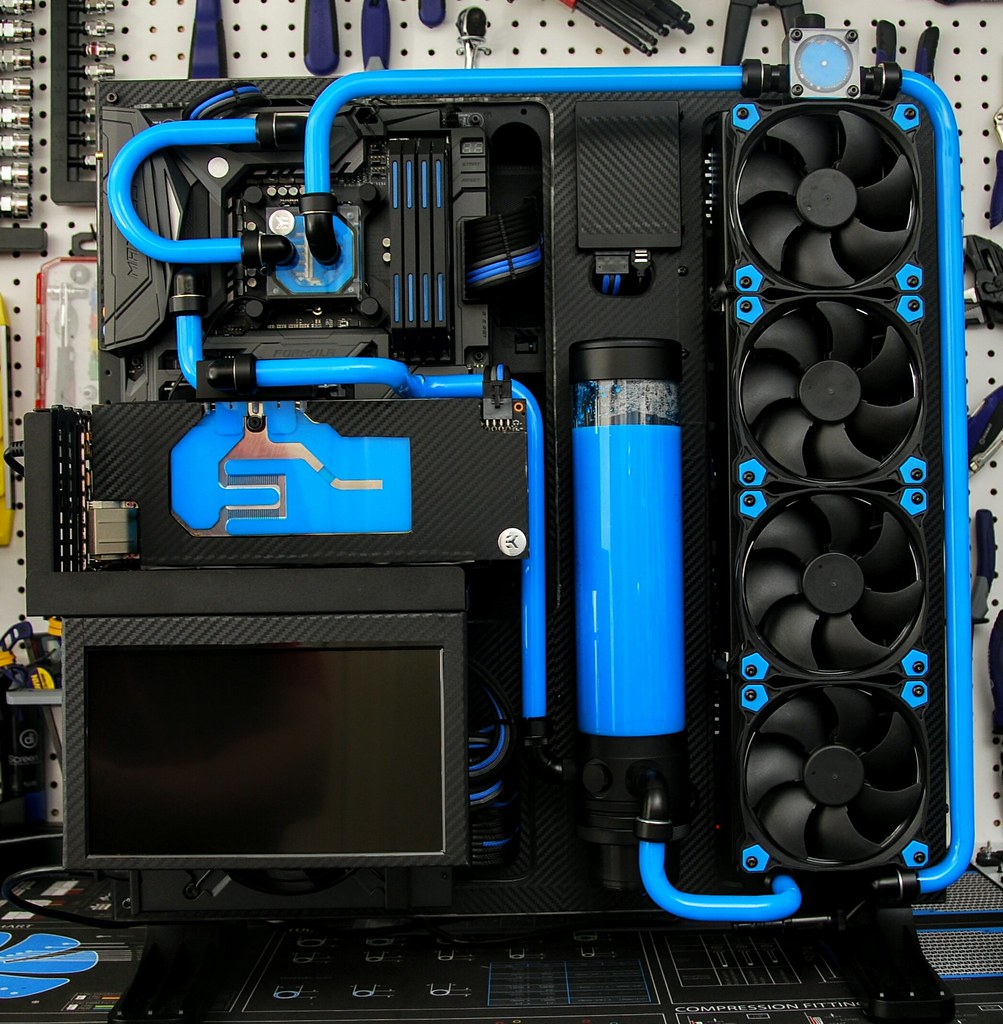
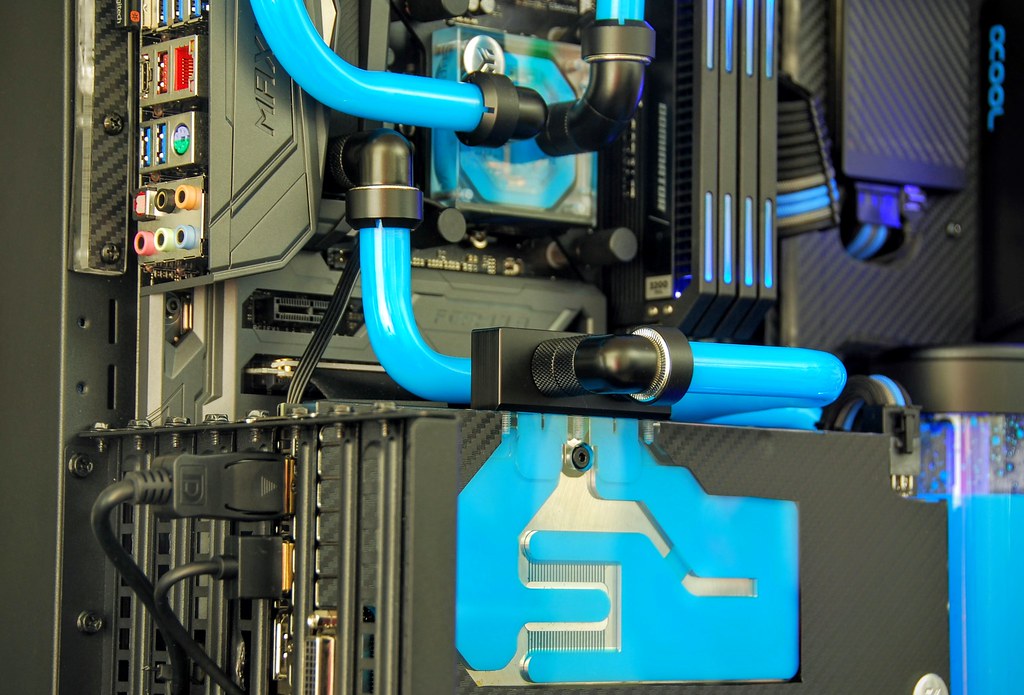
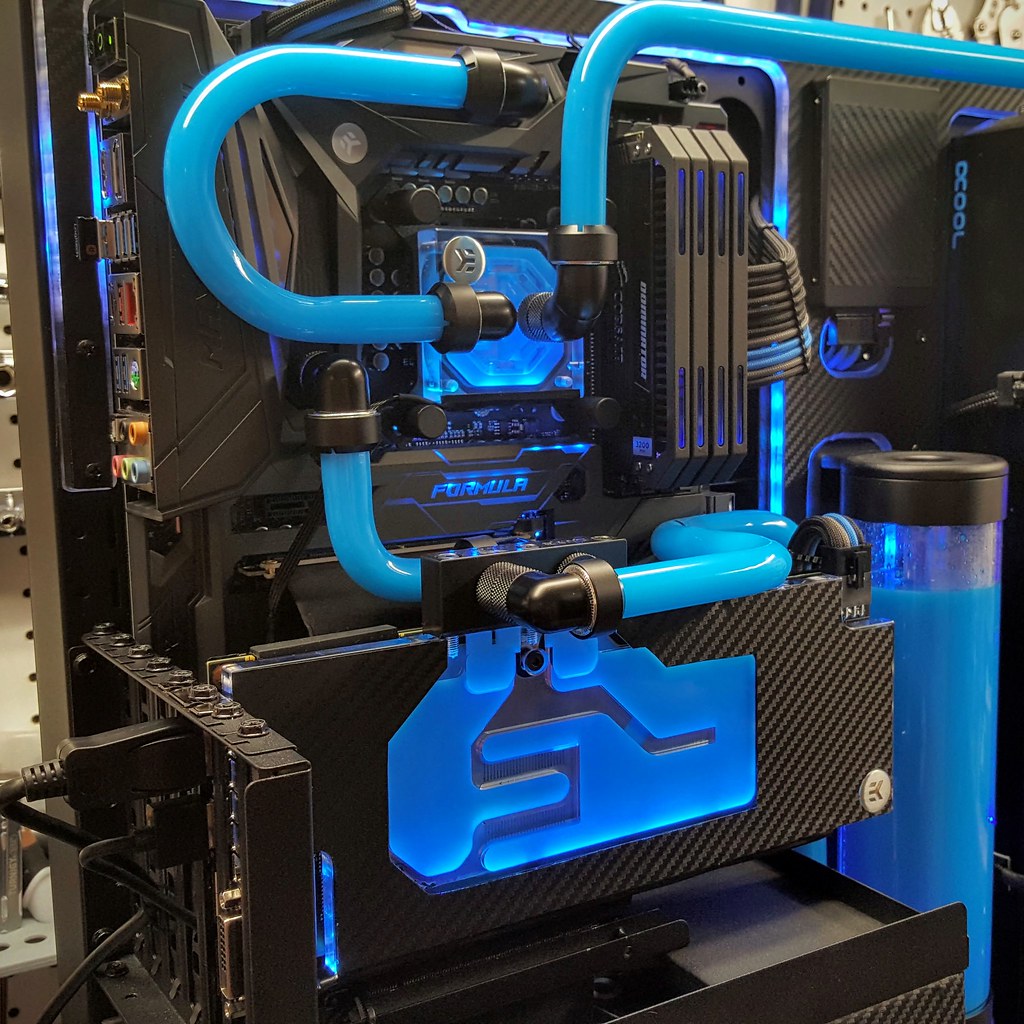
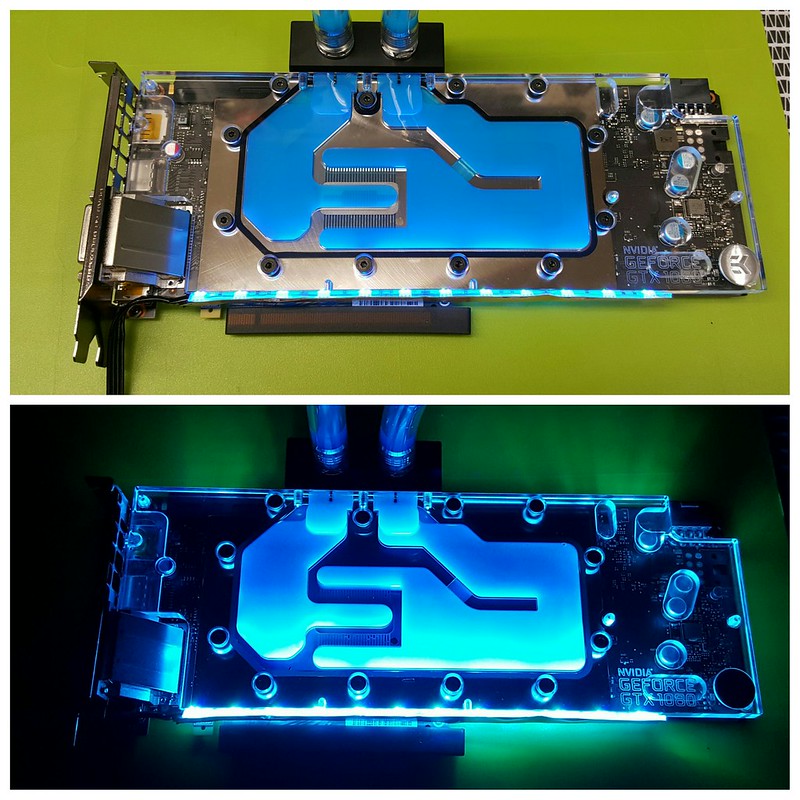
As nice as the photo above looks, all the little circles and cutouts glowing was a bit too distracting for my taste, so I went about using Carbon Fibre Vinyl to wrap the face of the block.  It worked really well, and helps focus the attention on just the fluid, and also glows around the exterior of the block similar to how I have the case setup.  They go really well together.


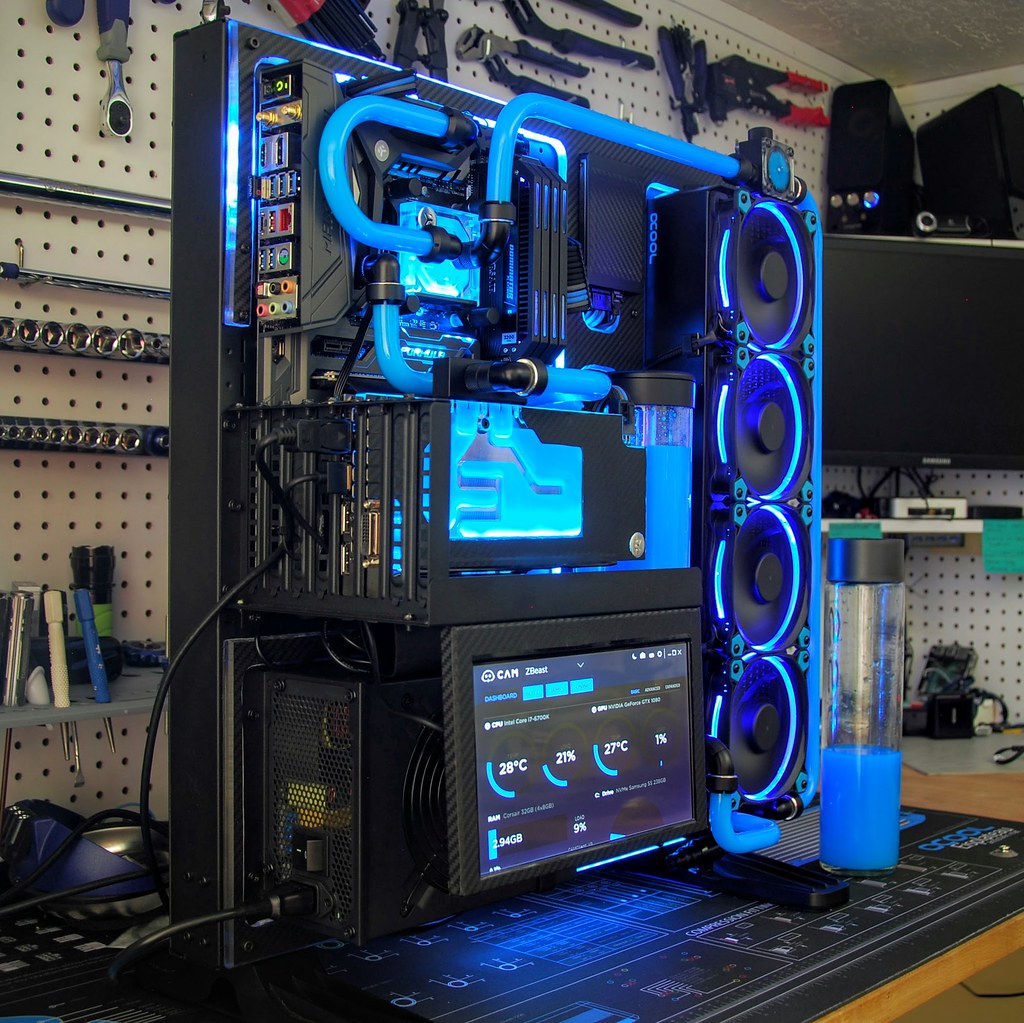
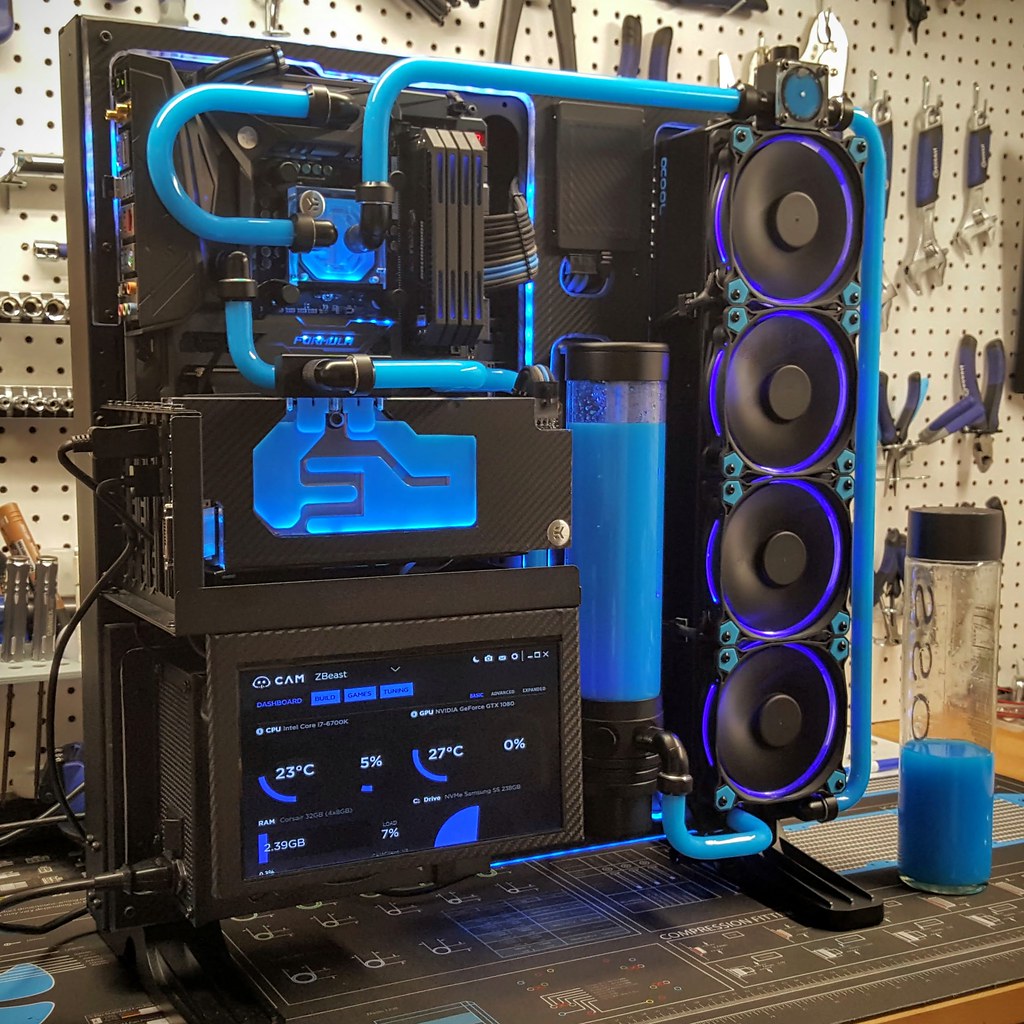
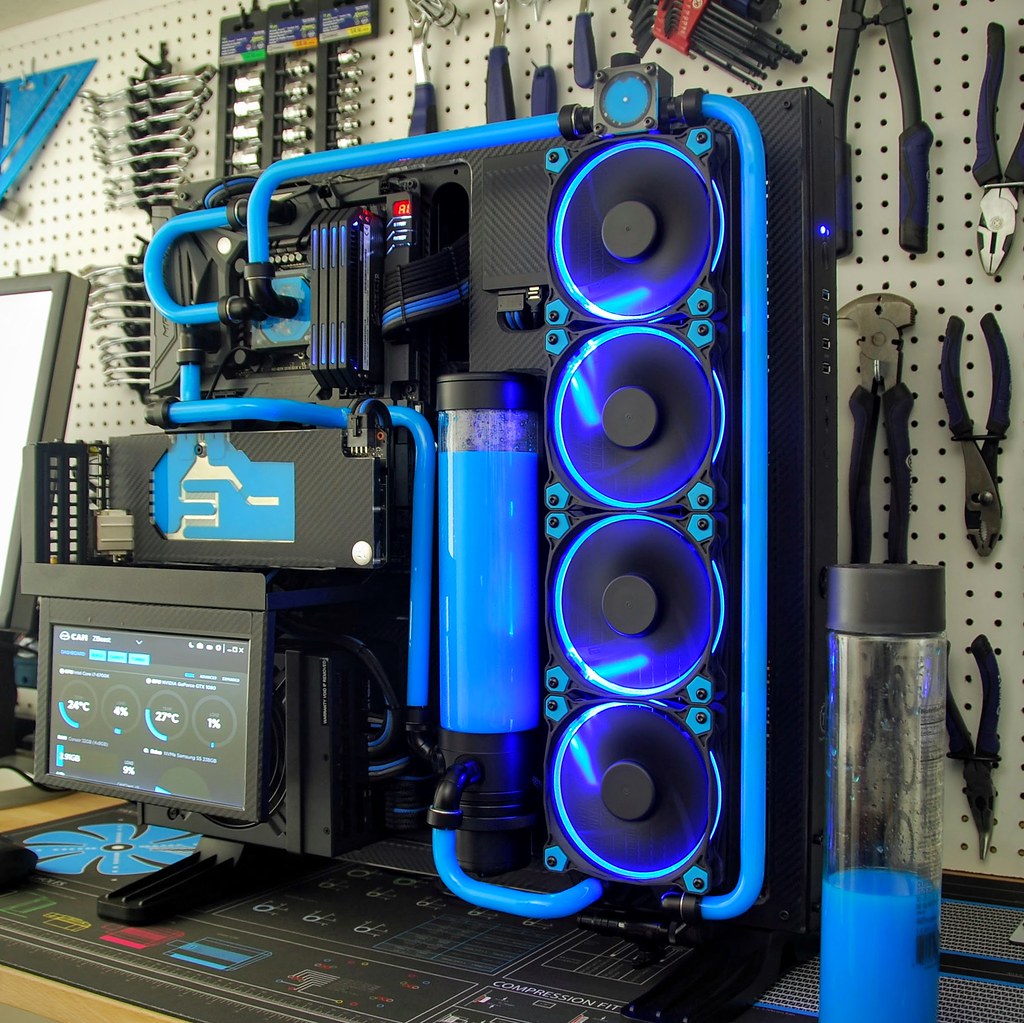
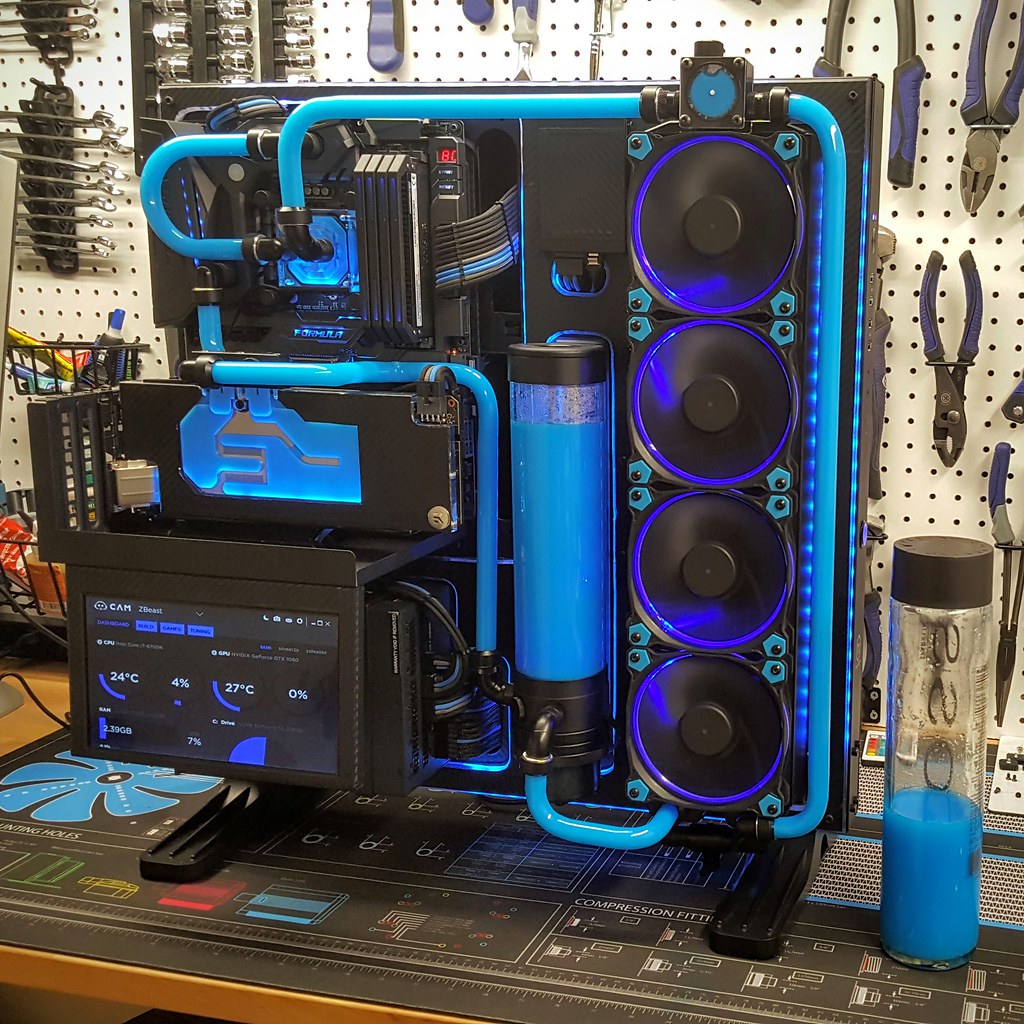
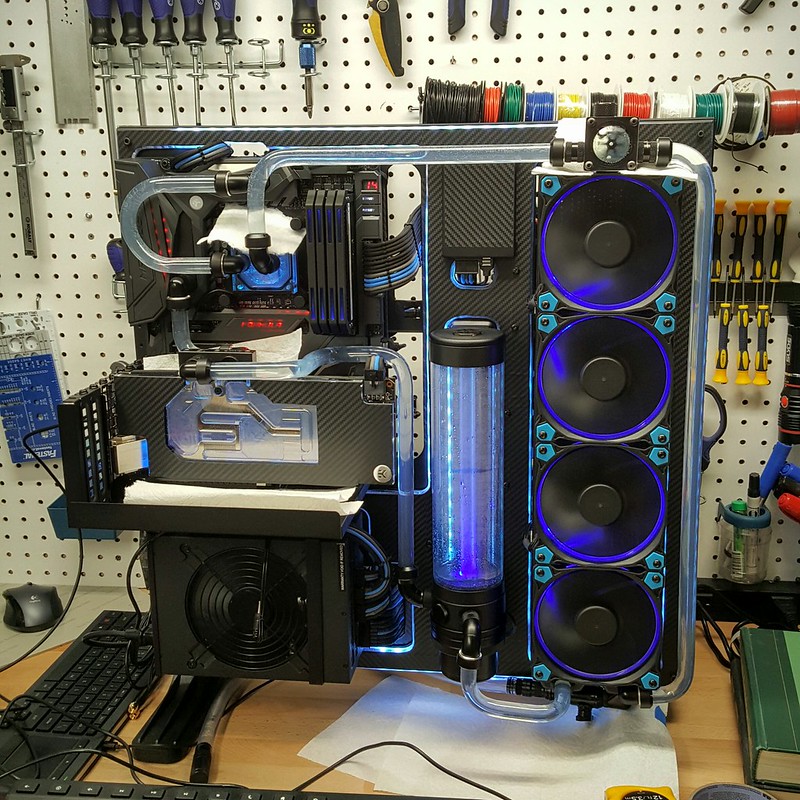
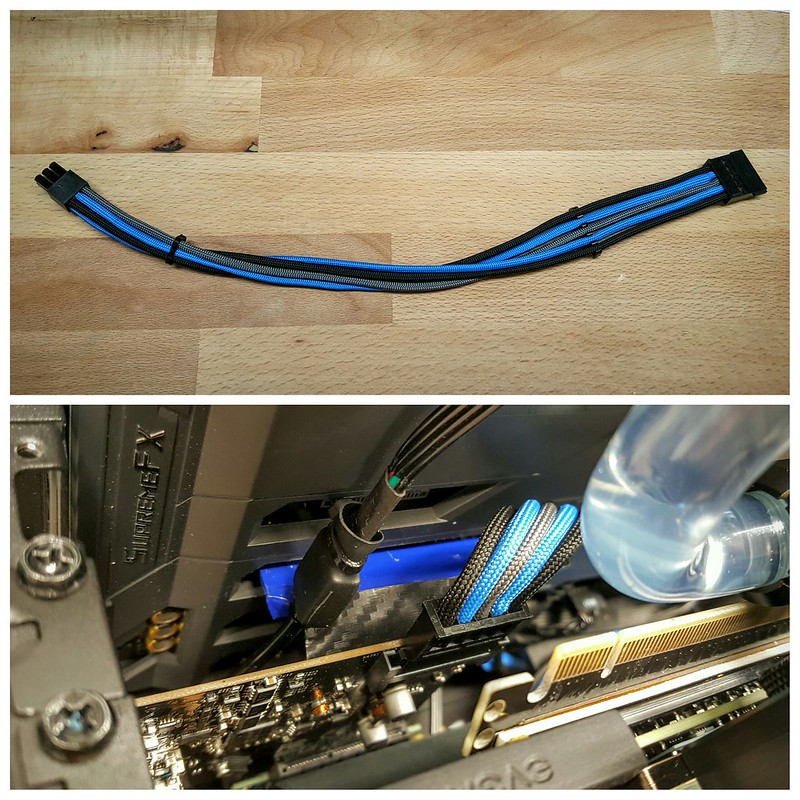
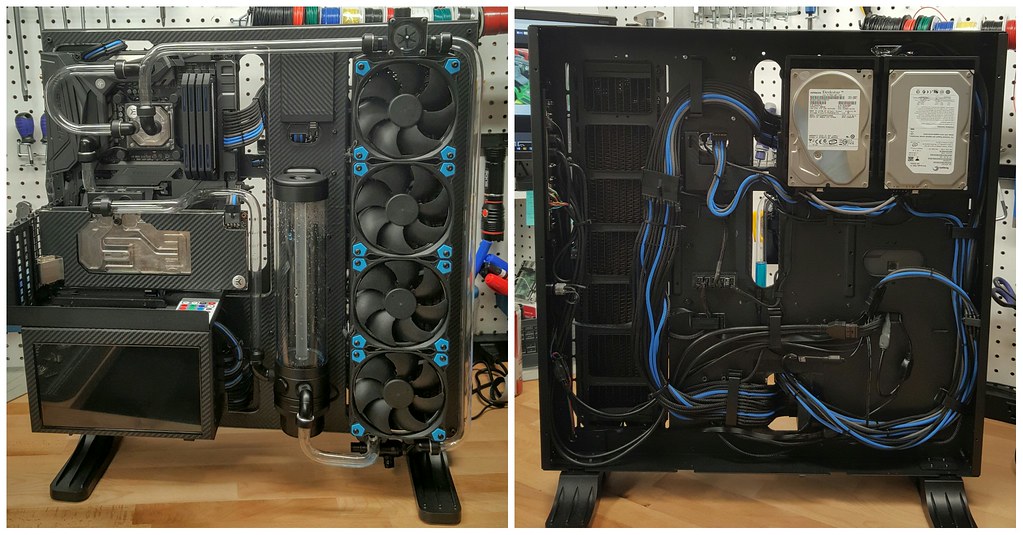
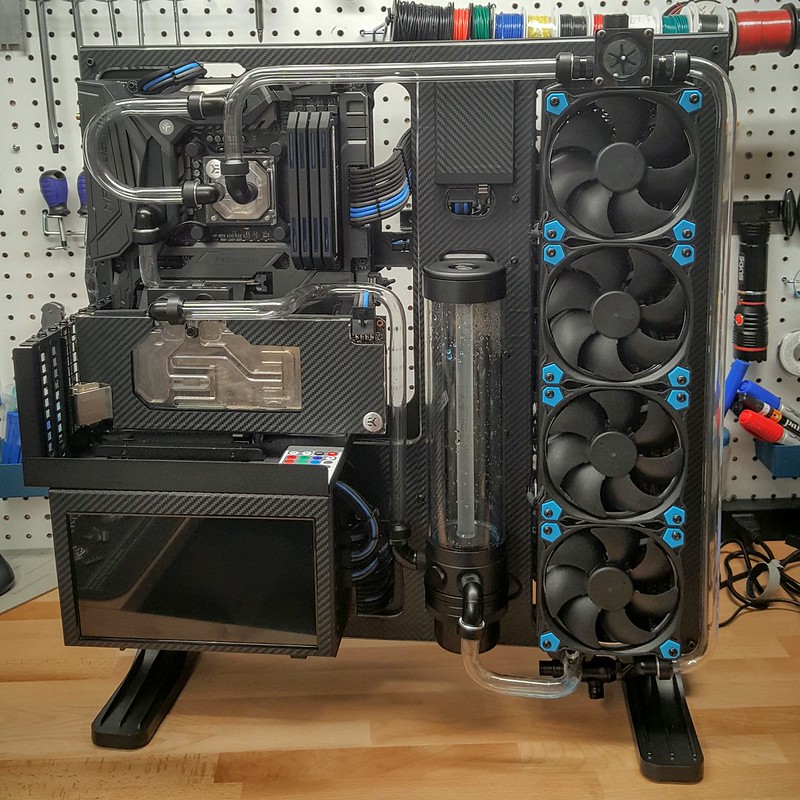
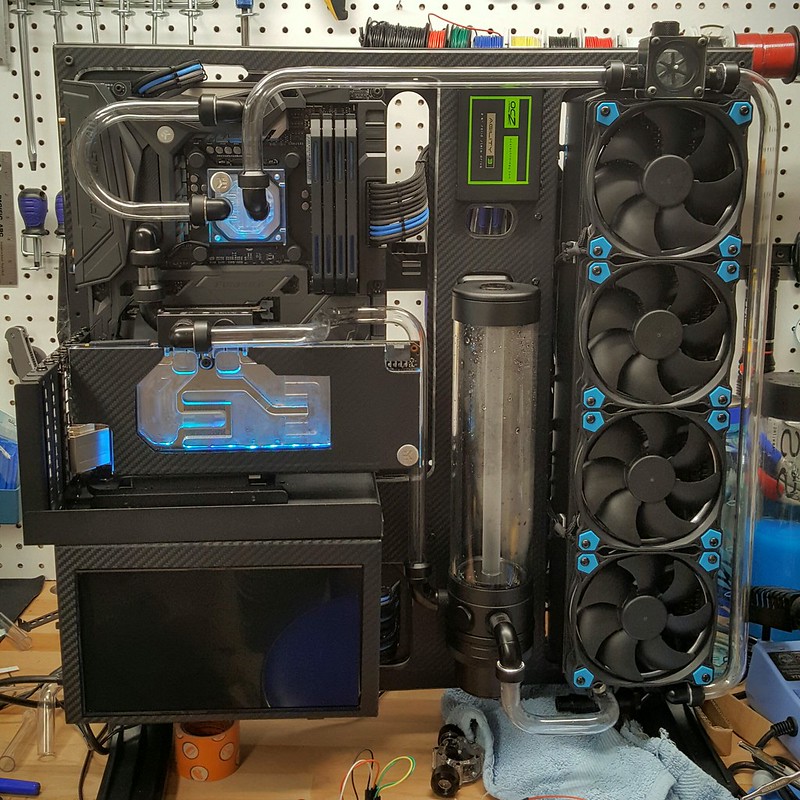
I drained the test fluid and installed the card on my case.  It looks really good sitting where it does, and as can be seen below in both the CPU and GPU blocks, the subtle blue glow really works well.  Can’t wait to finish my tubing so I can get some coolant running through this build!